This post may contain affiliate links, which means we may earn a small commission at no extra cost to you. We only share products we love to help you plan your parties. You can read our disclosure policy here.
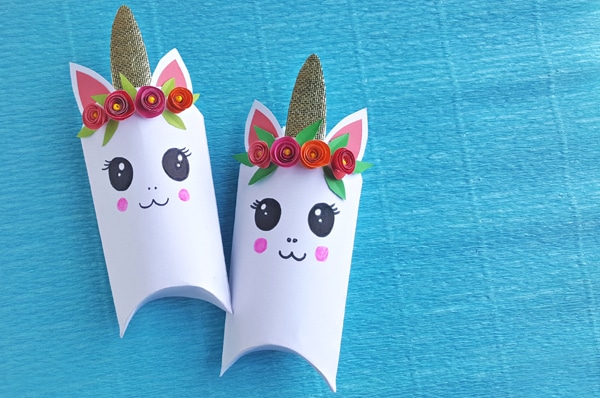
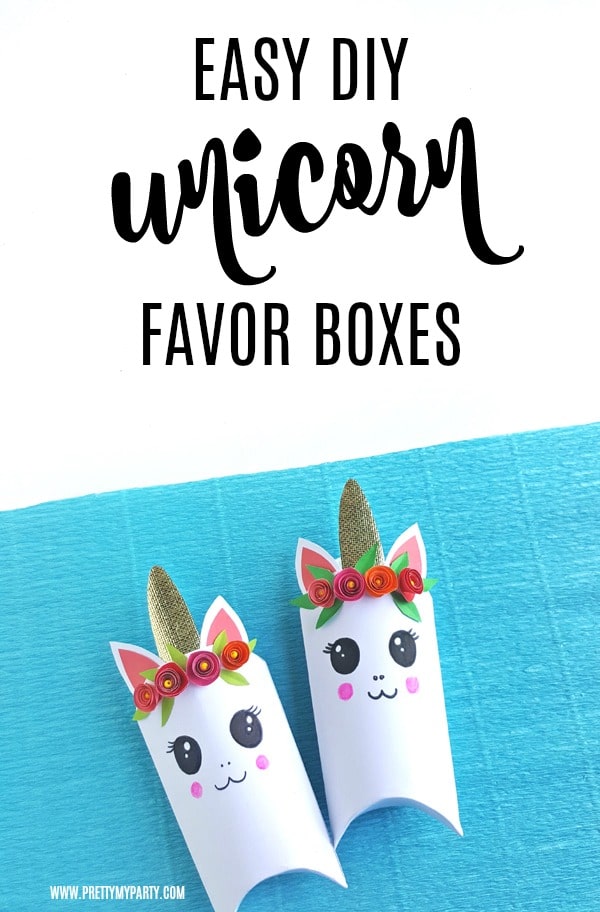
If you’re hosting a magical unicorn party, see how you can add these adorable DIY Unicorn Favor Boxes to your celebration!
These DIY Unicorn Favor Boxes are a great way to send everyone off with some goodies without breaking the bank. If your little one is set on having a Unicorn Birthday Party, then these Unicorn Party Favors will be a big hit!
Unicorn birthday parties are all the rage right now. There are so many cute ideas to look at when it comes to planning your own unicorn birthday bash. But these sweet DIY Unicorn Favor Boxes are so adorable! And they are really easy to make, too. Get your creative juices flowing and you’ll be able to get these created and ready to roll before your own Unicorn Birthday Party.
Learn how to make this Easy DIY Unicorn Centerpiece and these Easy Unicorn Poop Cookies for your party! Also, be sure to grab our FREE Unicorn Party Printable Bundle – 14 FREE Unicorn Party Printables!
Unicorn Party Supplies and Decorations:
- Unicorn Favor Bags
- Unicorn Party Kit for 12
- Unicorn Pinata
- Unicorn Chalkboard Sign
- Unicorn Cupcake Toppers
- Unicorn Headbands
Awe! Who wouldn’t want to go home with these sweet little faces above?! You can fill them with candy from a birthday party’s candy bar or you can put other little goodies in these Unicorn Party Favors, too. The sky is the limit and they are perfect for any upcoming baby shower or birthday party that you have a unicorn theme for!
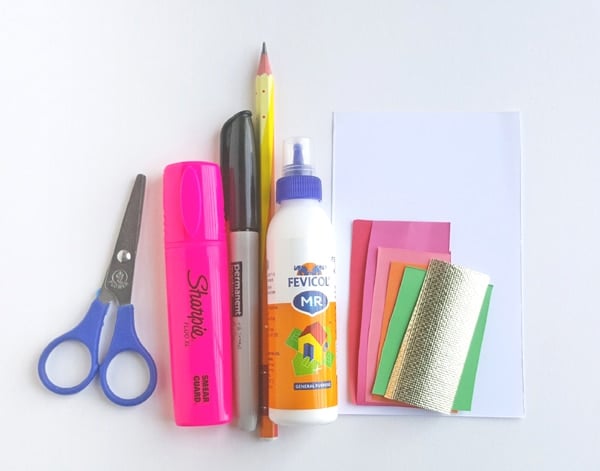
First, you will want to make sure that you have all of the supplies that you will need, which is listed at the bottom of this post. If you’re a crafter like we are, you should have a lot of these staples already in your arsenal. What you don’t have should be a quick stop to your local craft store and you’ll be set to go!
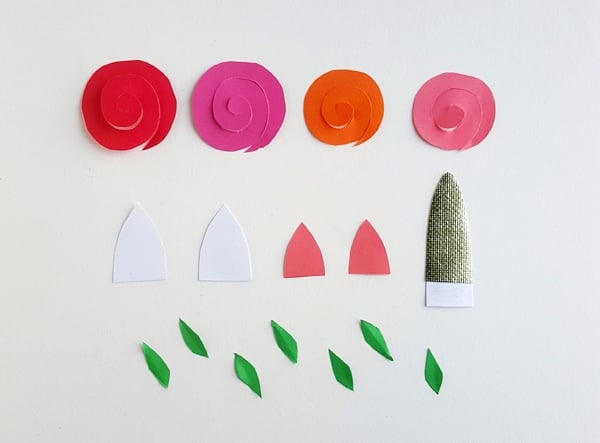
1. To begin, you will want to print and cut out all of the patterns that are given from the template, which you can find HERE. The template includes the following:
- Box Pattern
- 2 Outer Ear Patterns
- 2 Inner Ear Patterns
- 1 Spiral Pattern for Flowers
- 1 Leaf Pattern
- 1 Horn Pattern
Don’t worry, you can create as many flowers and leaves as you want, by simply reusing the template!
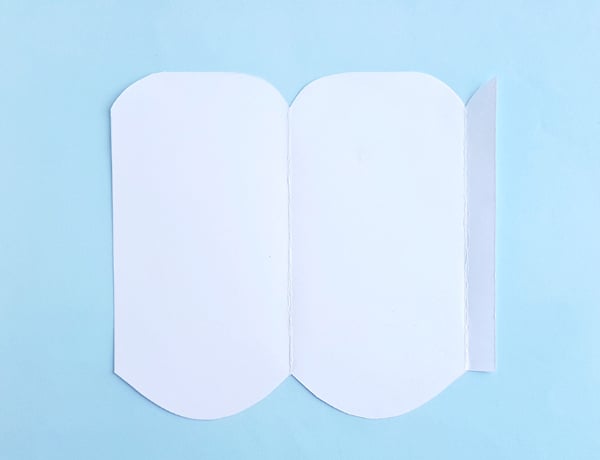
Trace the box pattern on a white piece of craft paper, or on any colored craft paper you want and cut it out nicely.
2. Trace and cut out the rest of the patterns on the selected craft papers and cut them out nicely. Again, feel free to make as many of the leaves as you desire for your magical unicorn!
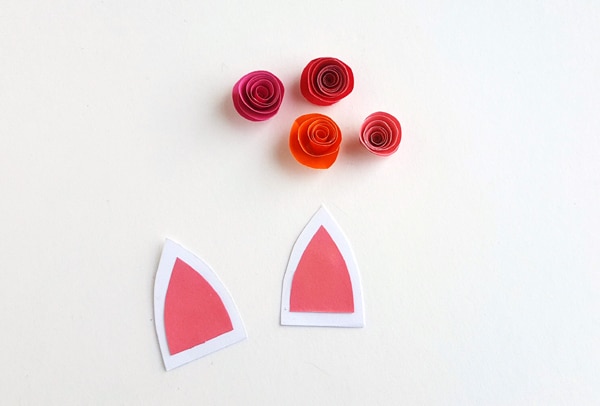
3. Glue the inner ear patterns on the outer ear patterns and use the spiral pattern to create rolled flowers. Roll the spiral from its outer edge, continue to roll towards the center of the spiral pattern and glue the roll with the center at the end to secure it. I made 4 flowers but you can make as many as you want for your Unicorn Party Favors. The spiral flowers are so fun to make!
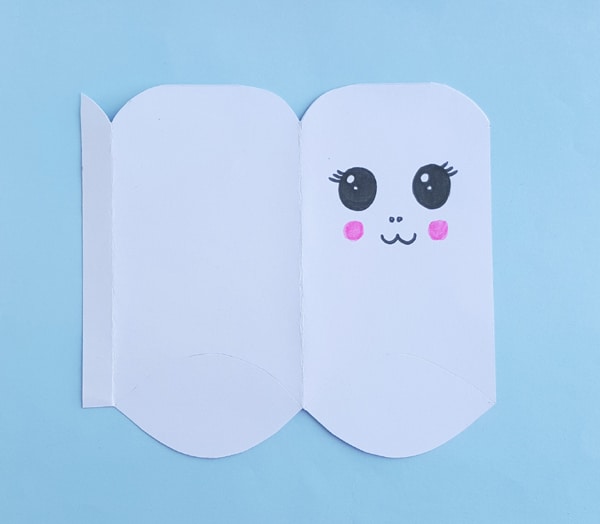
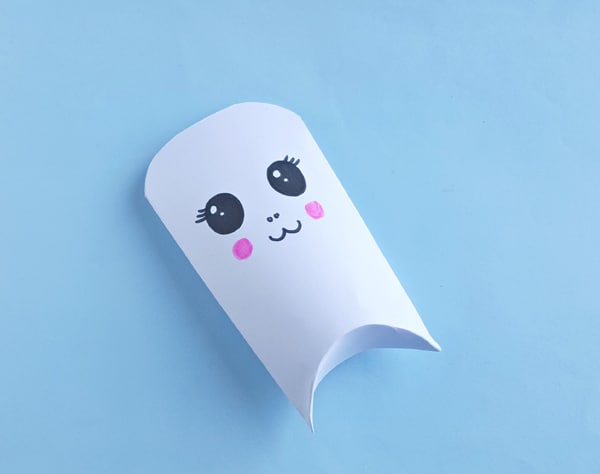
4. Use a pencil to draw the unicorn face on any one of the rectangular parts of the box pattern. Then, you will want to trace the patterns using a black permanent marker and create two blush patterns on both of the cheeks using a pink sharpie.
What a sweet little unicorn face!
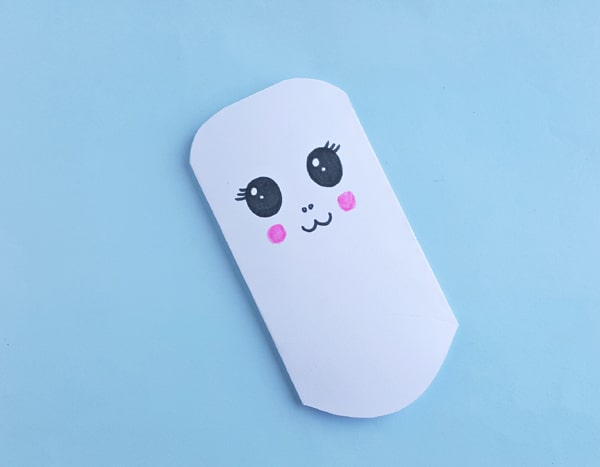
5. Fold the box pattern in half (leaving the 1 cm thin part). Apply glue along the 1 cm part and glue it with the rectangular part to close the sides of the box.
6. Create a crease along the 2 semi-circle parts at the bottom side of both rectangular parts and fold them towards the inside to create the bottom side of the box. It’s really starting to look like a party favor box now!
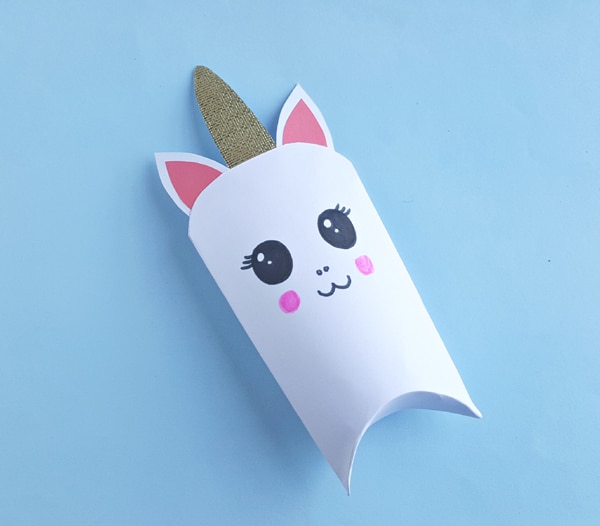
7. Glue the ears and the horn on the top open end of the box. You can glue them on the outer side or on the inner side of the box. However, it’s my personal preference that it is better to glue them on the inner side so they don’t show.
Look at that! You have a unicorn!
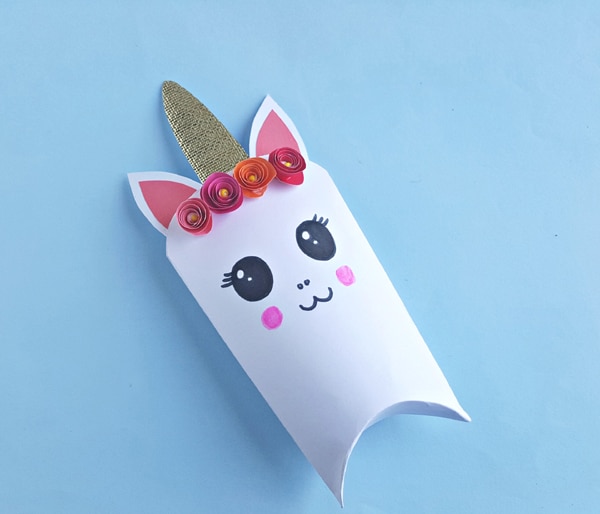
Now comes the fun part! You get to style these little DIY Unicorn Favor Boxes with all of the flowers and leaves you created!
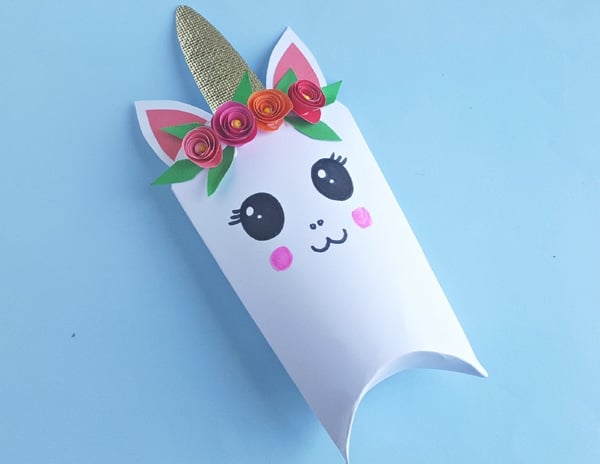
8. Glue the flowers below the ears and horns, along the top open edge of the unicorn box, as seen above.
9. Finally, glue the leaves in between the flowers however you like. Allow the glue to dry fully before adding anything to the box.
You can add more details if you want to or add personalized tags to each of the Unicorn Themed Party Favors. It’s always fun for the guests to get little party favor boxes that have that little personal touch with their own name on it!
Once you’re done decorating the box, place the favors inside through its open end. That’s all there is to it! If you have a little girl who is having a big unicorn birthday bash, you may want to even create these fun DIY Unicorn Favor Boxes together. You could create a little assembly line and have them all ready for the party in no time!
You did it! We hope you love these sweet Unicorn Favors as much as we do!
List of Supplies:
- Colored craft papers – including white
- Black permanent marker
- Pink Sharpie
- Scissors
- Craft glue
- Pencil
- Golden glossy craft paper – check your local craft store
- Template cut outs – Unicorn Favor Box Template
Instructions:
Step 1: Print and cut out patterns from the template. The template includes – box pattern, 2 outer ear and 2 inner ear patterns, 1 spiral pattern for the flowers, but you can create as many flowers as you want, 1 leaf pattern but you can use it to create as many leaves as you want, 1 horn pattern. Trace the box pattern on a white craft paper or on any colored craft paper as you want and cut it out nicely.
Step 2: Trace and cut out the rest of the patterns on the selected craft papers and cut them out nicely.
Step 3: Glue the inner ear patterns on the outer ear patterns and use the spiral pattern to create rolled flowers. Roll the spiral from its outer edge, continue to roll towards the center of the spiral pattern and glue the roll with the center at the end to secure it. I made 4 flowers but you can make as many as you want.
Step 4: Use a pencil to draw the unicorn face on any one of the rectangular parts of the box pattern; and then trace the patterns using a black permanent marker and create two blush patterns on both of the cheeks using a pink sharpie.
Step 5: Fold the box pattern in half (leaving the 1 cm thin part). Apply glue along the 1 cm part and glue it with the rectangular part to close the sides of the box.
Step 6: Create crease along the 2 semi-circle parts at the bottom side of both rectangular parts and fold them towards the inside to create the bottom side of the box.
Step 7: Glue the ears and the horn on the top open end of the box. You can glue them on the outer side or on the inner side of the box; but it’s better to glue them on the inner side.
Step 8: Glue the flowers below the ears and horns, along the top open edge of the unicorn box.
Step 9: Finally, glue the leaves in between the flowers however you like. Allow the glue to dry.
You can add more details if you want to. Once you’re done decorating the box, place the favors inside through its open end.
Enjoy!
Show us your DIY Unicorn Favor Boxes on Instagram by tagging @prettymyparty
