
Mini diaper cake tutorial with Diaper Genie refill
Learn how to make a mini diaper cake using a Diaper Genie refill—it’s a quick, easy, and budget-friendly!
This step-by-step mini diaper cake tutorial shows you how to turn baby essentials into a creative, photo-ready gift using just a few simple supplies. It’s beginner-friendly, takes about 15-20 minutes, and works perfectly as a DIY baby shower gift or centerpiece. They’re also great for baby sprinkles, sip and see celebrations, and co-ed showers. All you need is a box of diapers, a little patience, and a few cute decorations like bows, lace, or paper flowers.
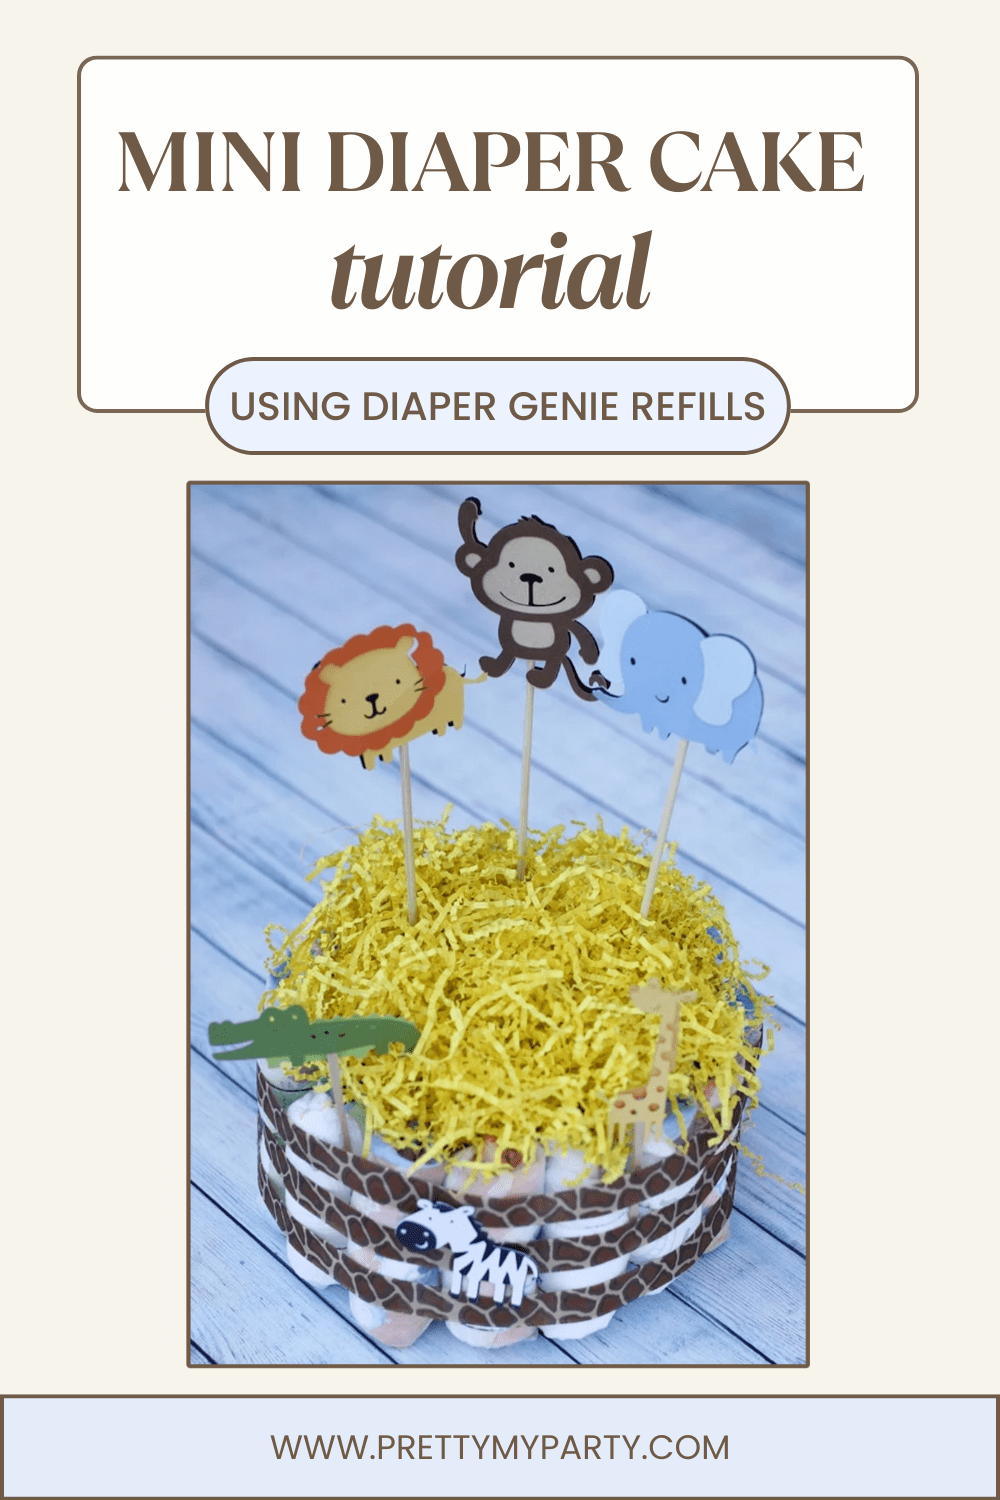
Table of contents
- What is a mini diaper cake?
- Quick-start instructions: how to make a mini diaper cake
- What supplies do I need for a mini diaper cake?
- Step-by-step mini diaper cake instructions
- How can I decorate a mini diaper cake?
- Add registry items to your diaper cake
- How much does it cost to make a small diaper cake?
- How long does it take to make a small diaper cake?
- Avoid these common diaper cake mistakes
- Mini diaper cake FAQs
- Final mini diaper cake checklist
What is a mini diaper cake?
A mini diaper cake is a small, one- or two-tier gift made from rolled disposable diapers and decorated with baby items like socks, pacifiers, or plush toys. It’s designed to look like a cake but is entirely made of practical baby supplies.
Quick-start instructions: how to make a mini diaper cake
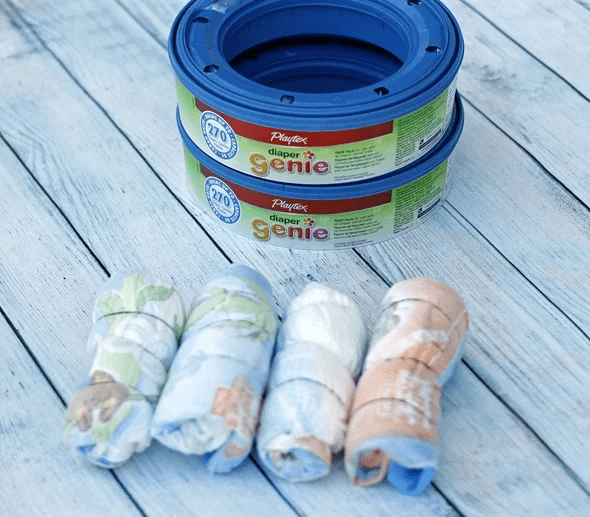
- Roll 20 size 1 diapers and secure with rubber band
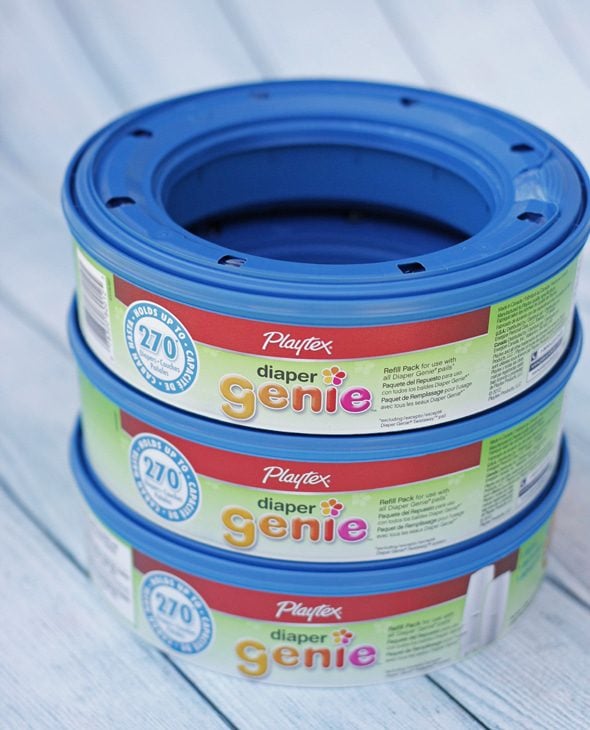
- Place 2 Diaper Genie refills on a 6–8 inch base
- Stand rolled diapers around the outside of the refills
- Secure with an extra-large rubber band
- Tuck in some crinkle cut paper (optional)
- Cover with ribbon, lace, or tulle
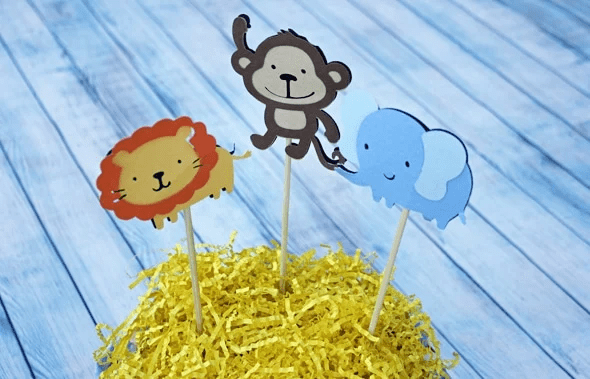
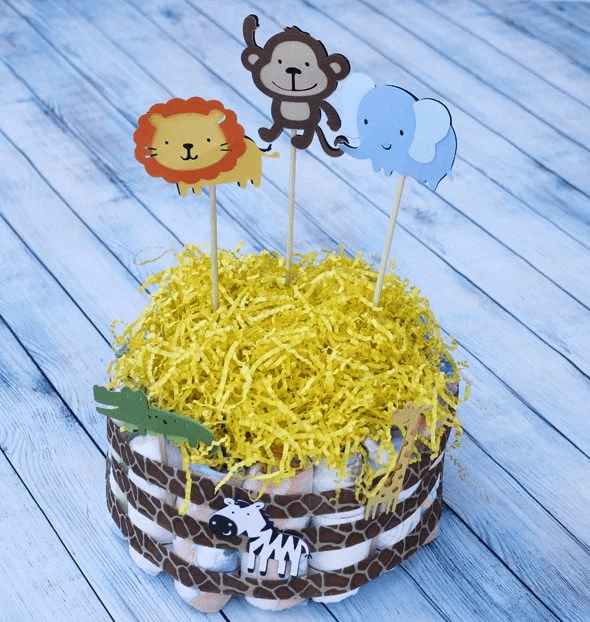
- Add small baby items (socks, pacifiers, or baby booties) or themed cardstock embellishments like the jungle animals above
- Top with a small plush or themed topper
Time required: 15-20 minutes
Skill level: Easy (no crafting experience needed)
What supplies do I need for a mini diaper cake?
Most supplies are inexpensive and easy to find. Some you may already have at home:
- 20 size 1 diapers (you’ll need more depending on how many tiers you want)
- 2 sealed Diaper Genie refills (or more depending on how tall you want it)
- Scissors
- Small and large rubber bands (1 small one per diaper)
- 1 6-8 inch base
- Ribbon, lace, or tulle (2–3 inches wide)
- Baby items: pacifiers, socks, booties, etc.
- Glue dots or hot glue gun (for ribbon or embellishments only)
- Paper flowers, cutouts, or mini succulents (optional)
- Crinkle cut paper in your choice color (optional)
Pro tip: Making more than one? A large value pack of diapers can make 5-6 mini cakes.
Step-by-step mini diaper cake instructions
Follow these easy diaper cake instructions to build your mini diaper cake from the bottom up.
Step 1: Roll the diapers
- Roll each diaper tightly from waistband to bottom
- Secure with a small rubber band
- Repeat with 20 diapers
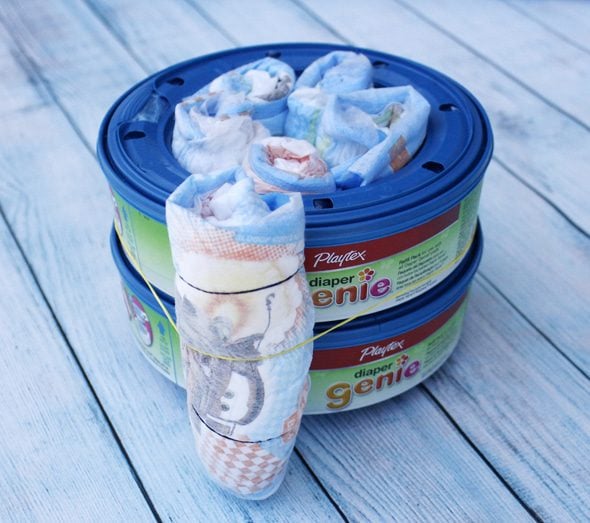
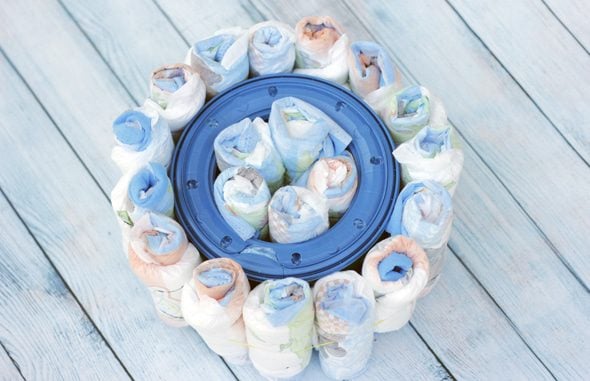
Step 2: Build your base
- Place your Diaper Genie refills on the center of your base
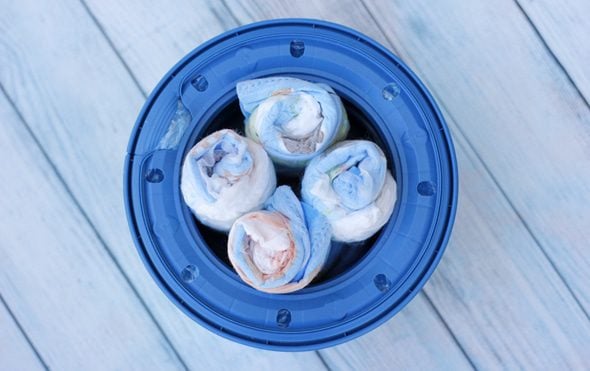
- Add 5 diapers to the center of the refills
- Stand the rolled diapers (about 15 diapers) around it to form the bottom tier
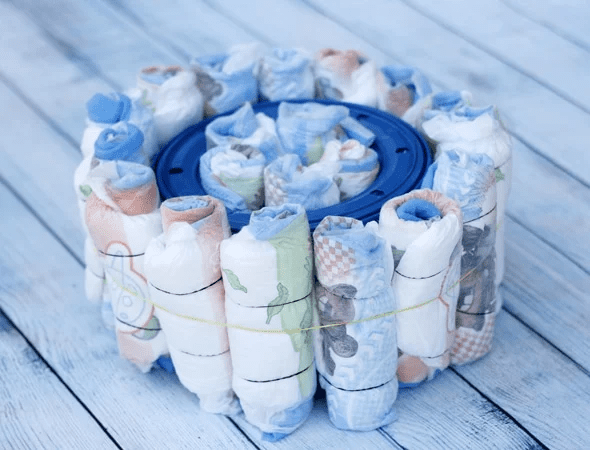
- Secure it with a large or extra-large rubber band

Step 3: Add ribbon and decorations
- Tuck some in some crinkle cut paper on top (optional)
- Wrap ribbon around to cover the rubber bands
- Secure the ribbon with glue dots or a hot glue gun (never glue the diapers directly)
- Add socks, baby booties, etc. around the sides as embellishments (optional)
- Add paper flowers, pacifiers, or themed paper cutouts to match your shower decor
Pro tip: Stick to lightweight decorations so your top layers stay upright
Step 4: Wrap or display
- Leave your cake unwrapped to use as a table centerpiece at your baby shower (or put two on the diaper raffle table), or wrap it in cellophane for gifting
- Add a name tag, thank-you card, or themed topper for a personalized touch
How can I decorate a mini diaper cake?
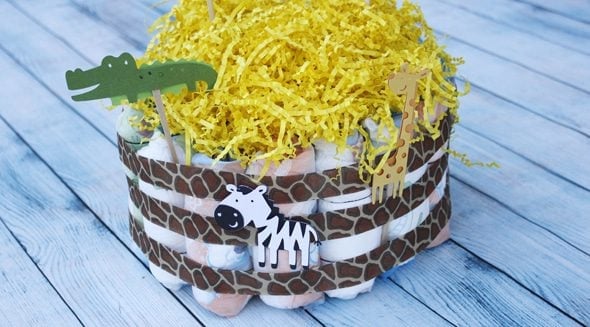
Match your diaper cake decorations to the baby shower theme or nursery colors. These popular themes work great for mini cakes:
Popular baby shower themes
- Woodland: Sage ribbon, paper cutouts of forest animals, fox plush on the top tier
- Safari: Animal print fabric, giraffe topper, leaf embellishments
- Boho:Tulle, faux succulents, neutral tones, dried florals
- Nautical: Navy ribbon, striped onesie tucked in the middle layer, anchor charm
- Princess or prince: Gold ribbon, crown topper, pink or blue paper flowers
Seasonal and gender-neutral styles
- Spring: Pastel bows, bunny topper, paper flowers
- Summer: Yellow tulle, citrus accents perfect for summer themes
- Fall: Burnt orange fabric, sunflower cutouts
- Winter: White lace, snowflake embellishments
- Gender-neutral: Ivory, sage, or mustard ribbon with stars, moons, or a “hello baby” topper
Add registry items to your diaper cake
A diaper cake is already a helpful gift, but adding items from the baby registry makes it even better for the parent-to-be.
- Travel-size baby shampoo or lotion
- Brand-specific pacifiers
- Onesies, bibs, mittens
- Teething rings or soft rattles
- A gift card taped to the base layer
What to write in your note:
“We added a few extras from your registry because cute and useful is the best combo.”
How much does it cost to make a small diaper cake?
| Item | Estimated cost |
|---|---|
| Small pack diapers (20) | $11-12 |
| Diaper Genie refills | 4 pack for $14 |
| Ribbon/lace/tulle and rubber bands | $10 |
| Base | $7-8 |
| Embellishments/decor | $10-25 |
| Total | $50-60 |
How long does it take to make a small diaper cake?
- First time: 15–20 minutes
- Assembly line for multiples: 5–8 minutes each
Pro tip: Pre-roll all your diapers in advance for faster setup.
Avoid these common diaper cake mistakes
- Don’t glue the diapers: Use glue dots or hot glue only on ribbon.
- Avoid newborn sizes: Size 1 or 2 works best for shaping and usability.
- Don’t skip the base: It keeps the cake stable for display or gifting.
- Limit decorations: Too many glued-on items make the diapers unusable.
- Go light on toppers: Heavy items can tip your cake over.
Mini diaper cake FAQs
What size base should I use for a mini diaper cake?
A 6–8 inch round base works best. Use a charger plate, cake board, or cardboard circle.
Can I use cloth diapers instead of disposable ones?
Yes, but you’ll need fewer per layer. Cloth diapers are thicker and work better for second or top tiers in a multi-layer design.
How many mini diaper cakes should I make for a baby shower?
Plan for one mini diaper cake per guest table or one for every 6–8 guests. They work great as table centerpieces, raffle prizes, or welcome table decor.
Can I make a mini diaper cake ahead of time?
Yes. You can assemble mini diaper cakes up to 2–3 weeks in advance. Just store them in a clean, dry space to keep them nice and photo-ready.
What’s the difference between a mini diaper cake and a three-tier diaper cake?
A mini diaper cake usually has one or two layers and is quicker to assemble. A three-tier diaper cake is larger, uses more diapers, and is often used as a main baby shower centerpiece.
Final mini diaper cake checklist
- Roll 20 size 1 diapers
- Build a sturdy base with 2 Diaper Genie refills
- Secure the tier with a rubber band
- Wrap ribbon or tulle to hide bands
- Decorate with baby items or themed add-ons
- Display as a centerpiece or wrap for gifting
Planning a shower? Save this guide, share it with your co-hosts, or pin it for later. This DIY baby shower gift is one they’ll actually use—and guests will love.
Did you make a mini diaper cake? I want to see it. Tag me @prettymyparty on Instagram for your chance to be featured. Can’t wait to see your creations!
Meet the Author
Cristy Posten is a party stylist, entertaining expert, and founder of Pretty My Party, with over a decade of experience helping readers make life’s biggest milestones truly special. She shares creative ideas for parties, holidays, and everyday celebrations — all designed to inspire and make hosting feel fun, beautiful, and stress-free.