
Colorful DIY Sharpie Marker Mason Jar Holder
Craft time is one of the most joyful moments in our home, especially when the kids get to mix creativity with something practical! This Colorful DIY Sharpie Marker Mason Jar Holder is the perfect example of that. It’s bright, fun, and a great way for little ones to stay organized while expressing themselves through color.
Whether you’re refreshing your child’s homework station, creating a teacher appreciation or birthday gift, or simply looking for an easy rainy-day project, this DIY Sharpie craft is sure to bring smiles (and a little less clutter!) to your home.
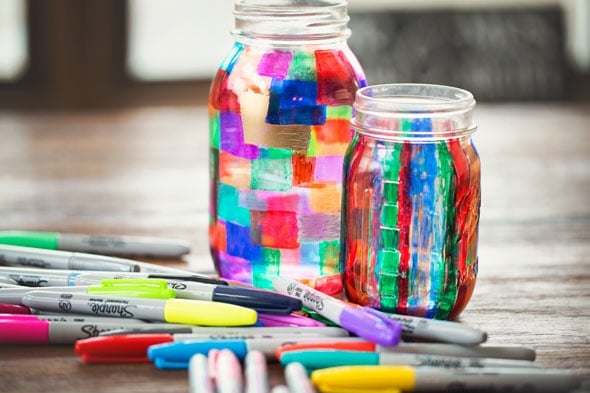
Table of contents
Why we love DIY Sharpie crafts for kids
There’s just something magical about Sharpie marker ideas—the colors, the creativity, and the endless ways to personalize just about anything.
Markers aren’t just for paper. They can transform everyday items into gifts, keepsakes, and decor, especially when paired with something as versatile as a simple mason jar.
This project is easy enough for preschoolers but fun and open-ended enough for older kids, too. And the best part? You probably already have most of the supplies at home!
It’s also a great activity to do after school or on the weekend when the kids need a screen-free way to unwind and get those creative juices flowing.
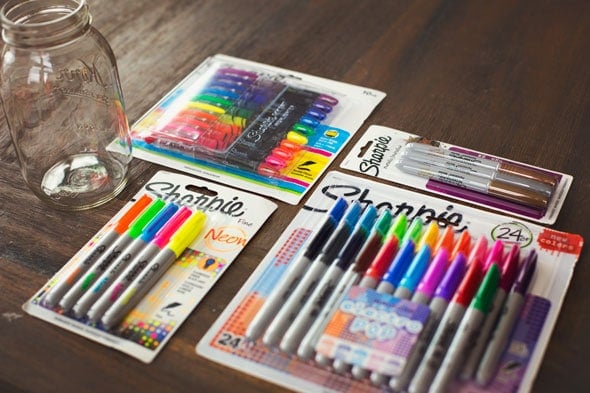
Supplies you’ll need
To create your Colorful DIY Sharpie Marker Mason Jar Holder, you’ll only need a few simple items:
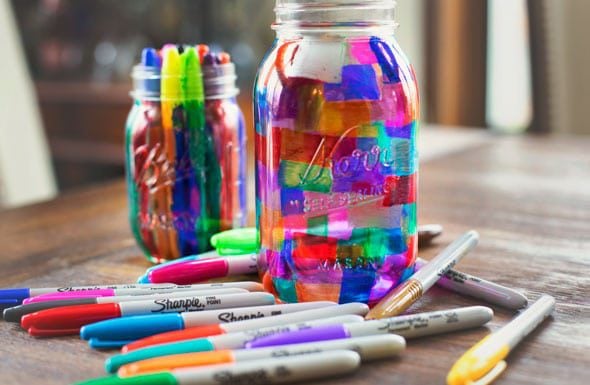
- Mason jars (clean and dry)—one per child
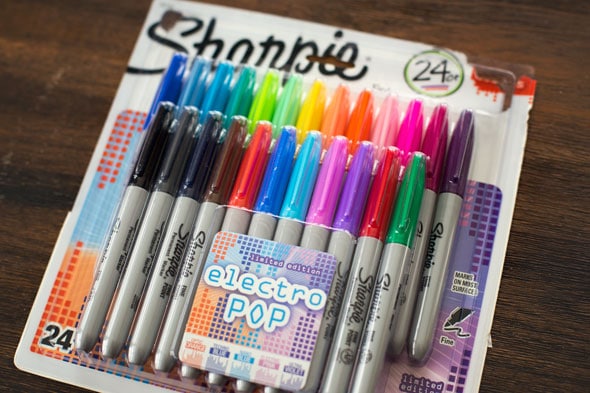
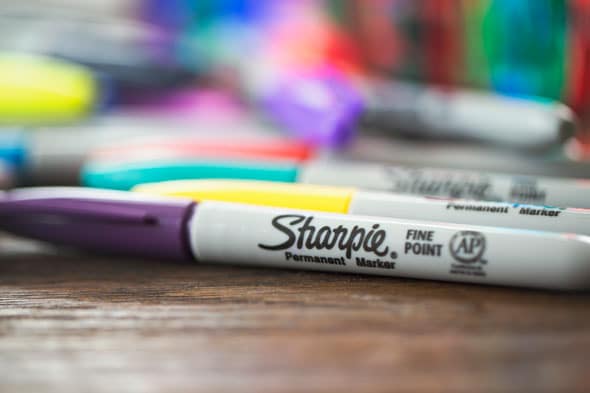
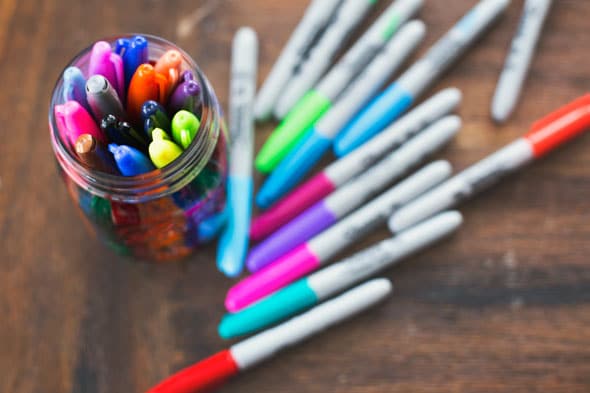
- Sharpie markers—in as many colors and styles as you like (fine point, metallic, neon, etc.)
- Paper towels and rubbing alcohol (optional, for touch-ups)
- A work surface or table covering (Sharpie is permanent, so you’ll want to protect your furniture!)
That’s it! This might be one of the easiest mason jar crafts for kids you’ll ever try.
Step-by-step: How to make your DIY Sharpie marker mason jar craft
Step 1: Clean and prep your mason jars
Before you start drawing, make sure each jar is clean and dry. Wipe them down with rubbing alcohol to remove any residue. This helps the marker ink stick better to the glass surface and keeps the colors nice and bright.
Step 2: Pick your colors
Start by letting the kids choose their color combinations. Encourage them to think in themes—maybe a rainbow jar, a pastel unicorn jar, or a bold superhero design.
Letting them pick their own colors gives them a sense of ownership over the project and adds that personal touch that makes these DIY Sharpie crafts so special.
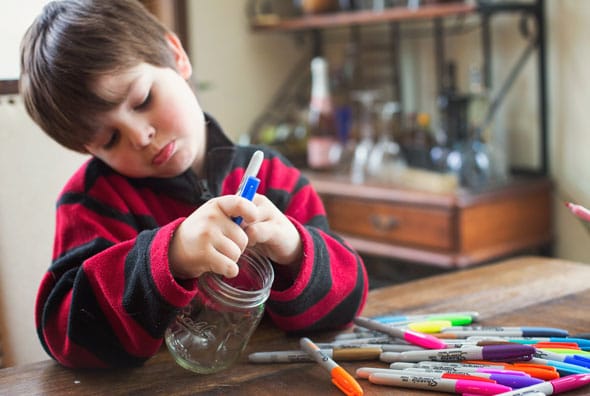
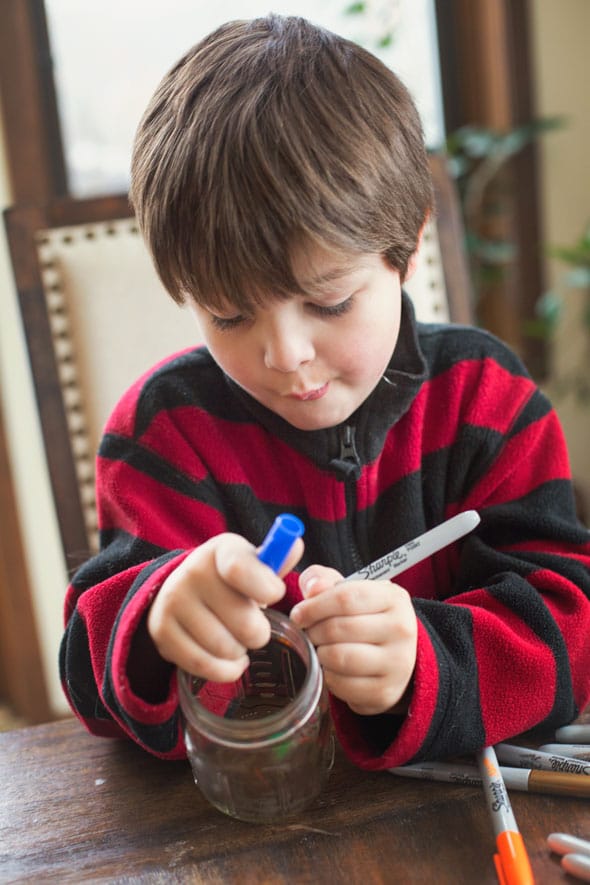
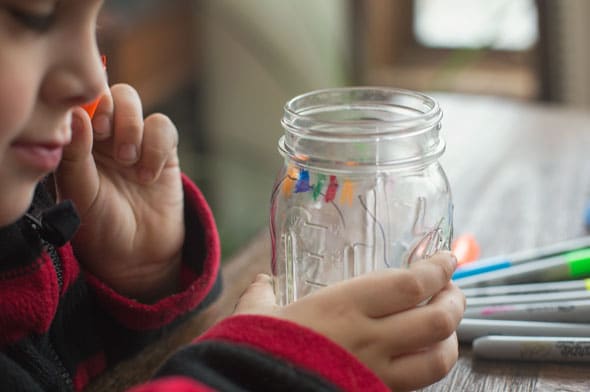
Step 3: Design time
Now for the fun part — it’s time to get creative!
There’s no wrong way to design your jar. Here are a few ideas to get you started:
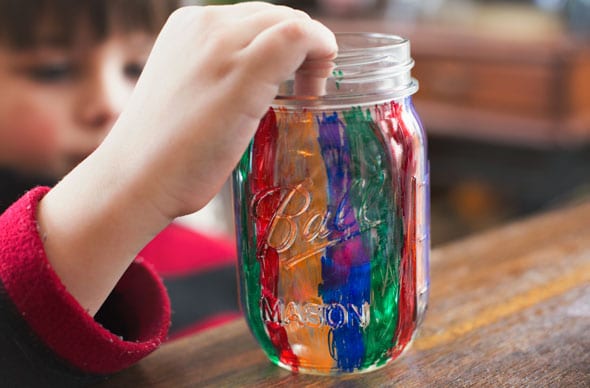
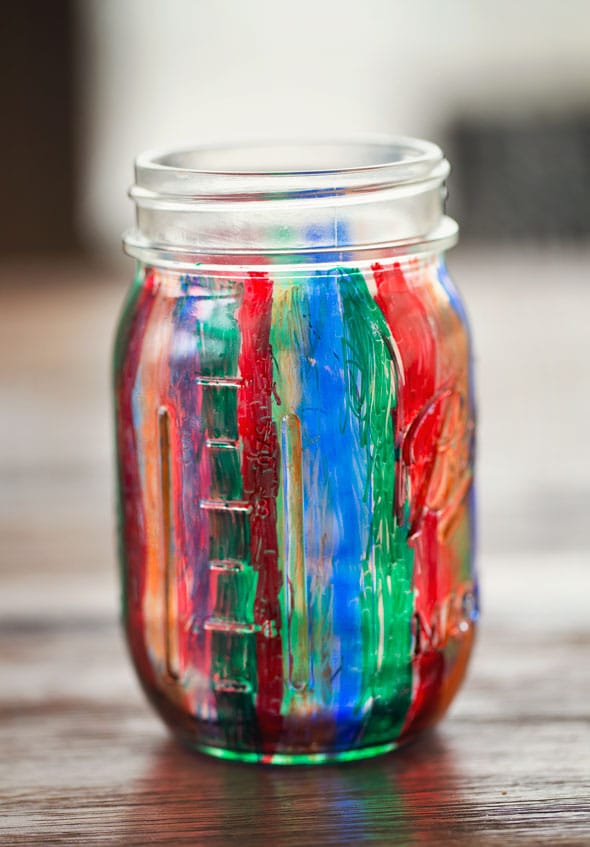
- Striped patterns: Draw colorful horizontal or vertical stripes around the jar.
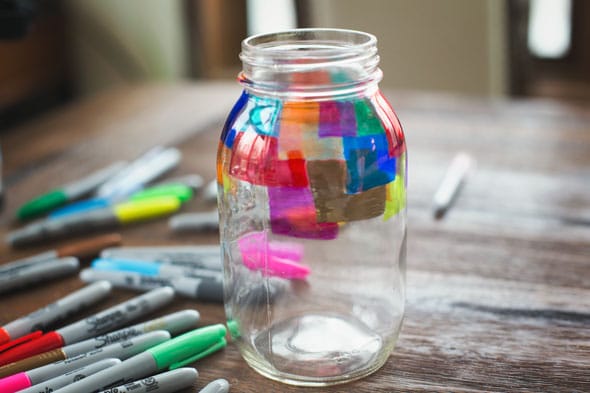
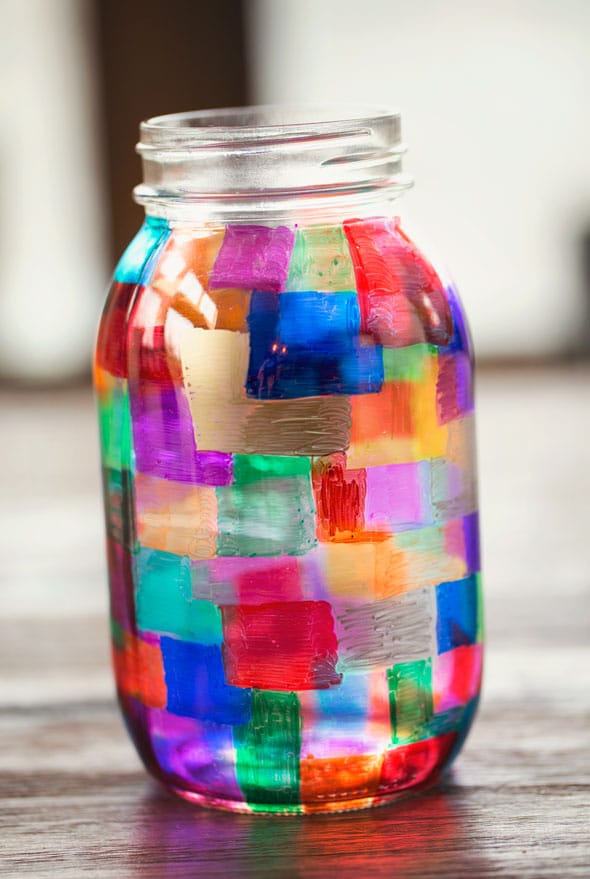
- Stained glass effect: Use blocks of different colors outlined with black Sharpie to mimic stained glass.
- Doodles and designs: Flowers, stars, swirls, and zigzags are always a hit.
- Name tags: Write your child’s name or label the jar with words like “Markers,” “Crayons,” or “Homework Station.”
Encourage the kids to experiment and have fun with it. The goal isn’t perfection—it’s creativity!
Step 4: Let it dry
Once the jars are fully decorated, let them sit for about 10–15 minutes so the marker can dry completely.
Step 5: Organize and enjoy!
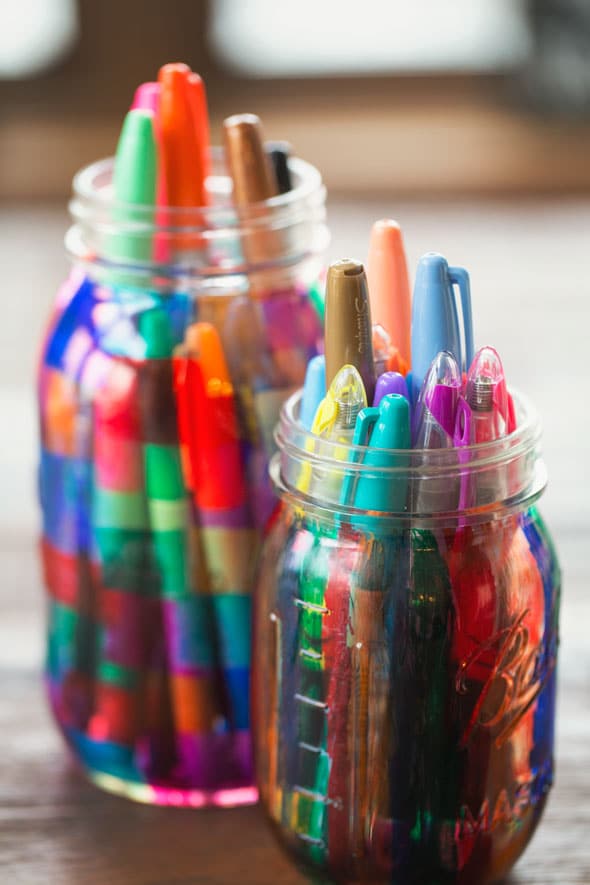
Once dry, fill the jars with your colorful Sharpie markers, pens, pencils, or even paintbrushes.
Line them up on your child’s desk, a craft shelf, or a homework station. The jars will help keep everything in one place and add a cheerful pop of color to any workspace.
Kid-approved creativity
What makes this craft extra special is how it combines creativity with functionality. Kids love seeing their designs displayed, and parents love how it helps keep supplies organized.
In our house, we made a few jars in different styles. My son went with a lined pattern around his jar—neat, colorful, and totally his own. I took a slightly different approach, creating a stained-glass window look with blocks of color.
Both jars turned out beautifully, and the best part was how much fun we had doing it together!
This activity is also a fantastic way to teach kids about organization. Instead of markers and pens ending up scattered around the house, they now have a fun, personalized home that they made themselves.
A thoughtful DIY gift idea
This Colorful DIY Sharpie Marker Mason Jar Holder is a great craft and makes a wonderful handmade gift!
Your child can easily turn their jar into a thoughtful present for a loved one or teacher. Here are a few ideas:
- Christmas gift: Have your little one decorate the jar with festive red, green, and gold Sharpies, then fill it with candy canes, small treats, or even school supplies. Wrap it with ribbon and a handmade tag for a heartwarming holiday gift that grandparents, aunts, and uncles will cherish.
- Teacher appreciation gift: Teachers always need extra pens and markers, and a hand-decorated jar made by their student is such a sweet, personal touch. Fill the jar with colorful pens, highlighters, or even homemade notes of appreciation. It’s a simple, budget-friendly way to show gratitude that’s both practical and heartfelt.
These jars can easily be customized for any occasion—birthdays, Mother’s Day, Father’s Day, or even “just because” surprises. Add a bow or a small tag with your child’s name, and you’ve got a beautiful, one-of-a-kind gift that’s sure to make someone’s day.
More fun Sharpie marker ideas
Once you start creating with Sharpies, you won’t want to stop! Here are a few more Sharpie marker ideas you can try:
- Personalized mugs: Draw on plain white mugs and bake them to set the ink.
- DIY gift tags: Cut out cardstock shapes, decorate them with Sharpies, and tie them with ribbon.
- Decorated notebooks: Add doodles or colorful lettering to the covers of school notebooks.
- Customized flower pots: Turn terra cotta pots into mini works of art.
- Glass ornaments: Perfect for holidays or special occasions!
Each project is quick, fun, and gives kids a chance to experiment with color, pattern, and design.
Tips for a successful DIY Sharpie craft
Here are a few quick tips to make your project go smoothly:
1. Work in a well-ventilated area. Sharpie markers can have a strong smell, so fresh air helps.
2. Keep paper towels handy. If a mistake happens, rubbing alcohol can help erase it before it dries.
3. Don’t rush. The slower the kids go, the neater their designs will be.
4. Show off the results! Encourage them to display their creations proudly—maybe even share a photo of their jars on social media.
Why this craft is perfect for families
Life gets busy—between school, work, and activities, it’s easy to forget to make time for creativity. But a simple, fun project like this can bring the family together.
It’s screen-free, budget-friendly, and perfect for all ages. Younger kids love the bright colors, while older kids enjoy experimenting with more complex designs. Even adults find it relaxing!
Plus, this project helps build important skills:
- Creativity: Thinking about color and design
- Fine motor skills: Drawing and detailing on glass
- Organization: Giving supplies a dedicated, tidy space
It’s more than just a fun activity—it’s a confidence booster for kids and a beautiful way to spend quality time together.
Ready to create your own Mason jar masterpiece?
So, grab your favorite Sharpie markers, a few mason jars, and let the fun begin!
Once your jars are finished, fill them with your favorite art supplies and set them out for everyone to admire. They’re perfect for homework areas, craft rooms, or even as colorful centerpieces on a table or shelf.
And if you’re craving more creative inspiration, check out some of our other DIY crafts for kids on Pretty My Party. From colorful slime to holiday decorations, you’ll find tons of ideas to keep little hands busy and imaginations running wild all year long!
This Colorful DIY Sharpie Marker Mason Jar Holder is super easy but absolutely adorable. It combines art, organization, and family time into one creative activity that anyone can enjoy.
It’s the perfect rainy-day project, holiday craft, or heartfelt handmade gift—proving that sometimes the simplest ideas make the most meaningful memories.
So next time you’re looking for a quick and fun craft that brings everyone together, grab those Sharpies and mason jars—your next masterpiece (and maybe even your next Christmas or teacher gift!) is just a few doodles away.
If you try this project, we’d love to see your creations! Tag @PrettyMyParty on Instagram and share your photos with the hashtag #PrettyMyPartyDIY—we can’t wait to see how your mason jar crafts for kids turn out!