A DIY paper pom cake topper is my favorite fast upgrade for store-bought or homemade cakes because it makes them look custom for just a few dollars. You add color, height, and texture without special tools or skills, and you can match your theme in minutes.
I reach for it for last-minute parties and places that don’t allow candles. The toppers are reusable, easy to size for cupcakes or full cakes, and fun to make with kids. Grab paper scraps, pick two or three colors, and you’ve got a stylish finish that looks planned, not rushed.
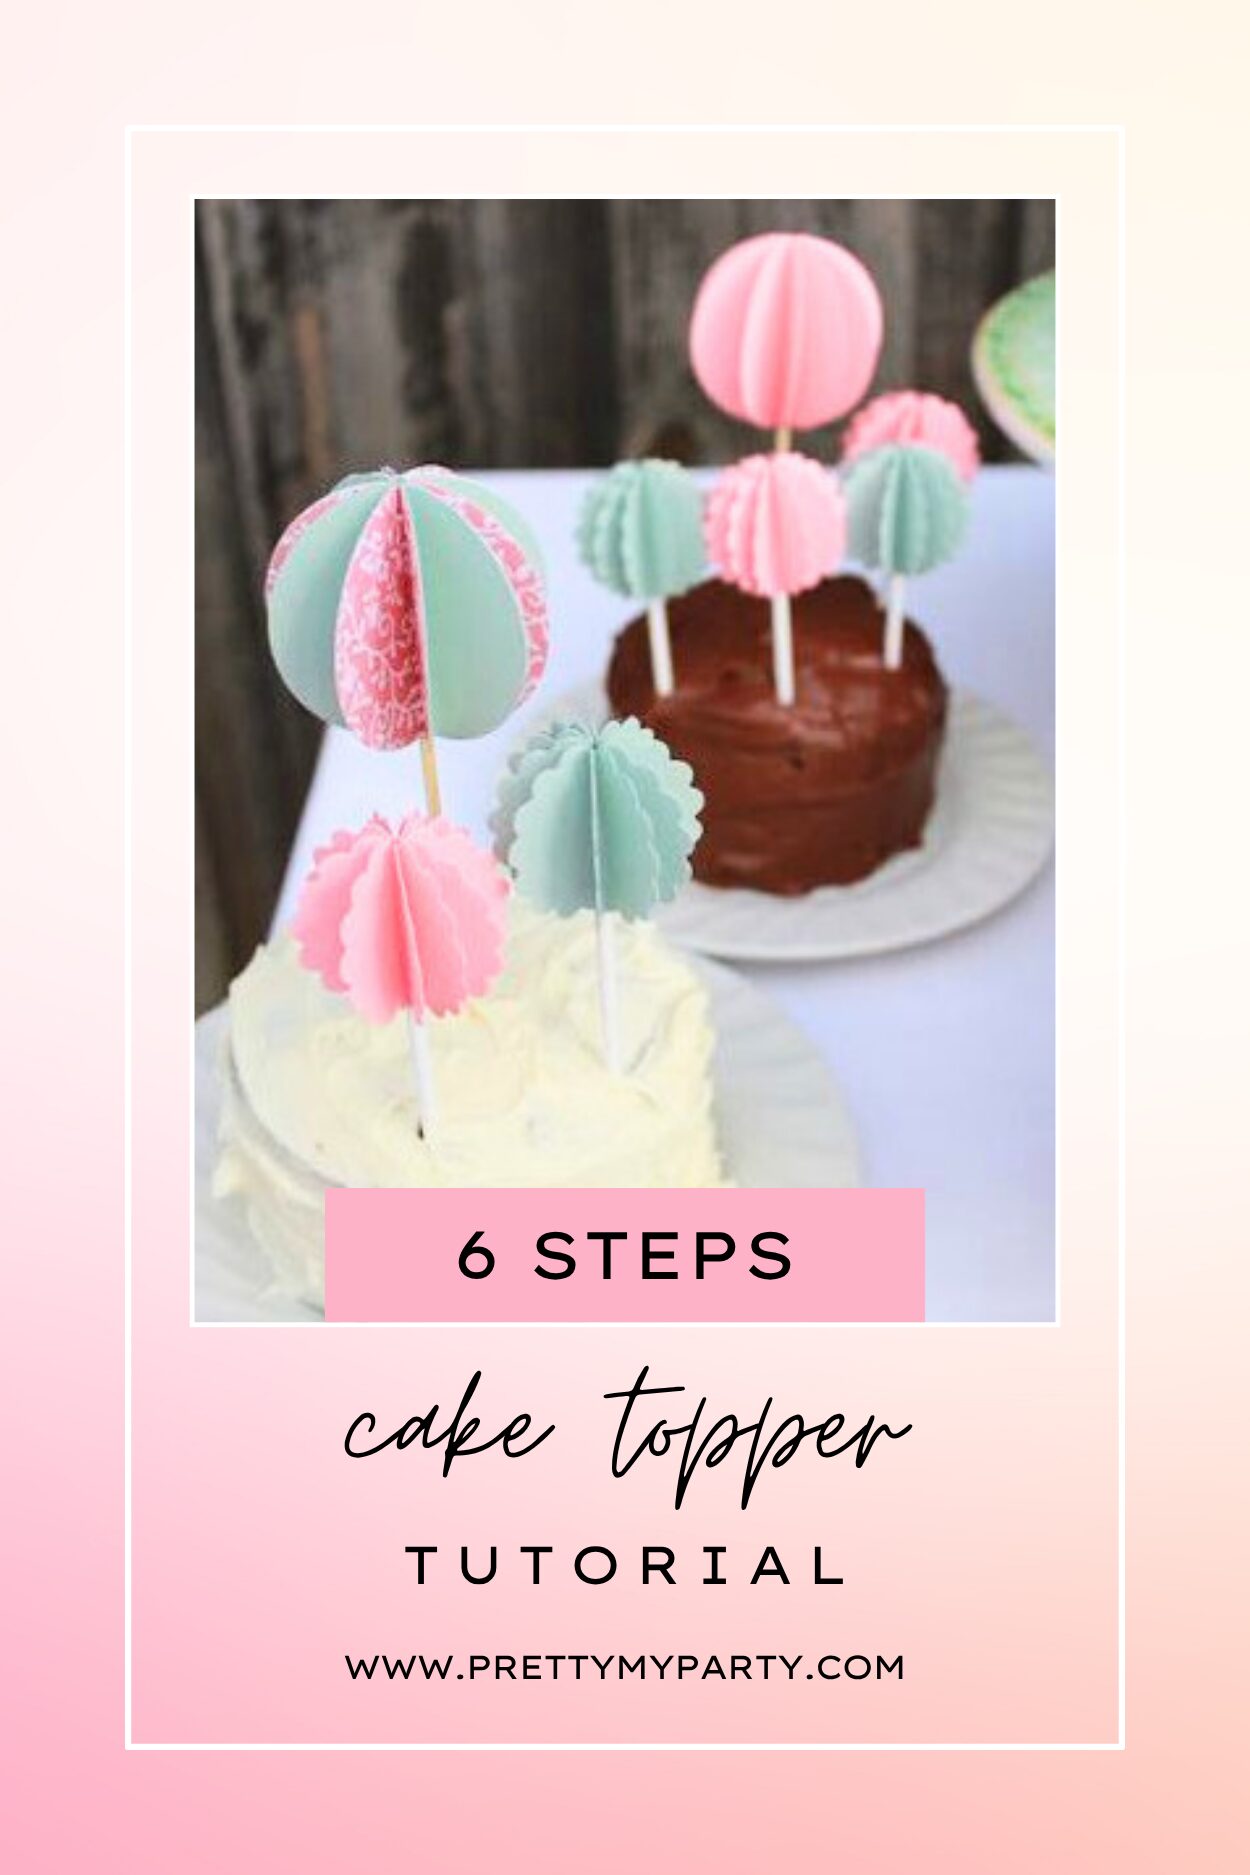
Table of contents
I’ve tested cardstock and tissue, and I’ll explain when to use each, the best punch sizes for cupcakes vs. cakes, and how to keep glue and dye away from frosting. You’ll get a simple supplies list, clear steps, and fixes for common hiccups so you can make the perfect cake toppers on your first try.
DIY paper pom cake topper at a glance
To make a DIY paper pom cake topper, punch 10 paper circles (about 1.75 in/44 mm), fold them in half, glue five halves into each side, sandwich a lollipop stick between the two halves, then glue closed. Use cardstock or non-bleeding tissue, a food-safe stick, and keep glue off the cake surface. Total time: 15–20 minutes per topper.
- Use 65–80 lb (176–216 gsm) cardstock or non-bleeding tissue for crisp poms
- Choose food-safe sticks (lollipop or bamboo picks) and keep adhesives off the cake
- Make minis for cupcakes or a trio for a full cake
- Total cost stays low with scraps and a basic circle or scallop punch
- Punch 10 circles, fold, glue into two halves, attach stick, close
What is a DIY paper pom cake topper?
A DIY paper pom cake topper is a small, layered paper “pom” glued around a food-safe stick and popped into your cake or cupcakes for a fun added decoration. It’s fast, cheap, and easy to customize for birthdays, showers, graduations, and holidays. I tested cardstock, non-bleeding tissue, and glitter papers—cardstock wins for clean edges, tissue wins for fluff.
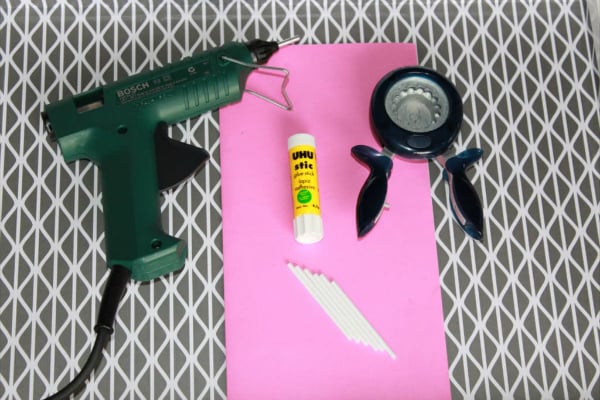
Tools and materials
Time: 15-20 minutes per topper
Skill: Beginner
Makes: 1 topper (repeat for more)
- Paper: 65–80 lb (176–216 gsm) cardstock or non-bleeding tissue paper
- Paper punch: 1.75 in (44 mm) circle or scalloped circle (any 1.5–2 in/38–51 mm works)
- Adhesive: Glue stick or tacky glue for paper; double-sided tape or hot glue for the stick area
- Stick: 6 in (15 cm) lollipop stick or bamboo food pick
- Optional: String and two skewers for bunting style, washi tape, fine glitter, or mini stickers
- Basics: Scissors, ruler, scrap paper to protect your table
Safety note: The topper is decorative and not edible. Keep adhesives and non-food materials from touching the cake surface. See safety section below.
Step-by-step: how to make paper pom cake toppers
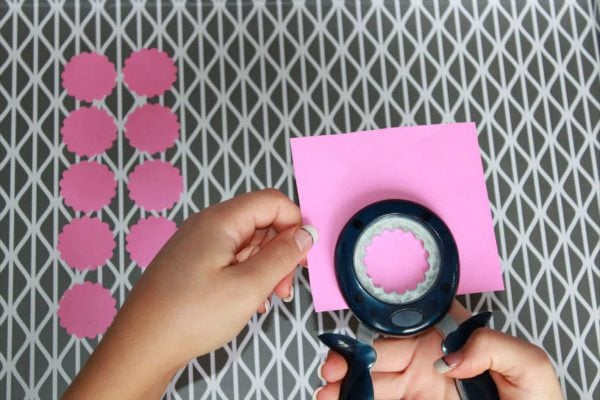
1. Punch the shapes
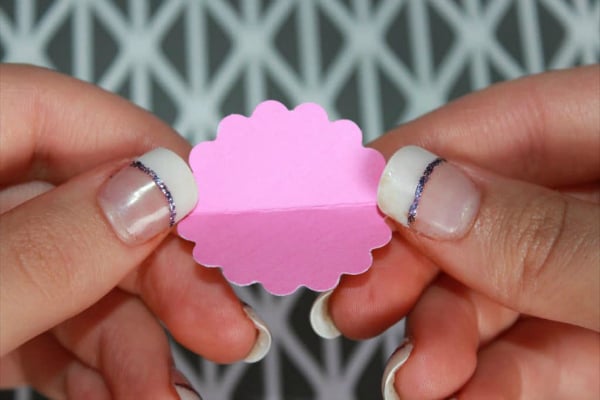
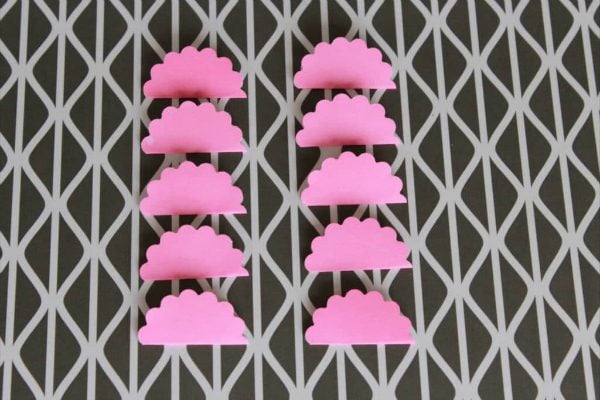
Punch 10 circles per pom. For minis, use 1–1.25 in (25–32 mm); for bold toppers, go up to 2 in (51 mm).
2. Fold and prep
Fold each circle in half, crease well.
3. Make two halves
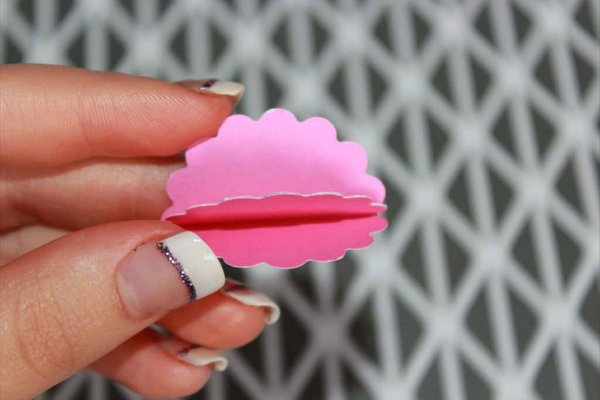
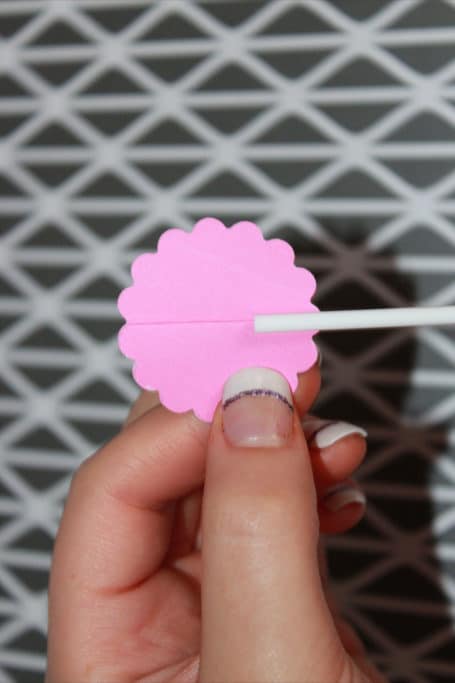
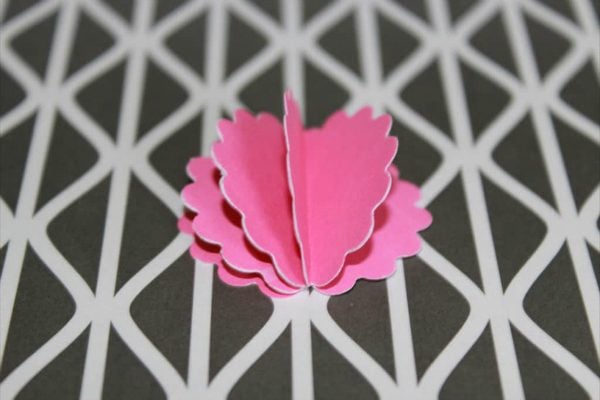
Glue five folded circles edge-to-edge to form a half-pom. Repeat with the remaining five to make the second half. Keep folds aligned.
4. Add the stick
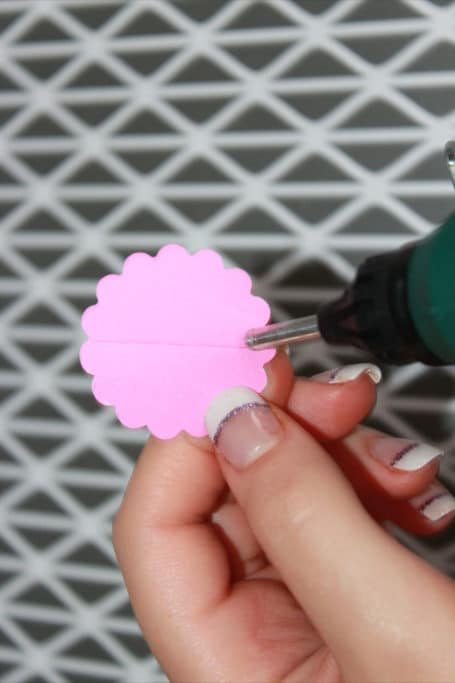
Place a lollipop stick at the spine of one half. Secure with a thin line of hot glue or double-sided tape. Keep adhesive away from the bottom ½ in (1.3 cm) that will sit above the cake.
5. Close the pom
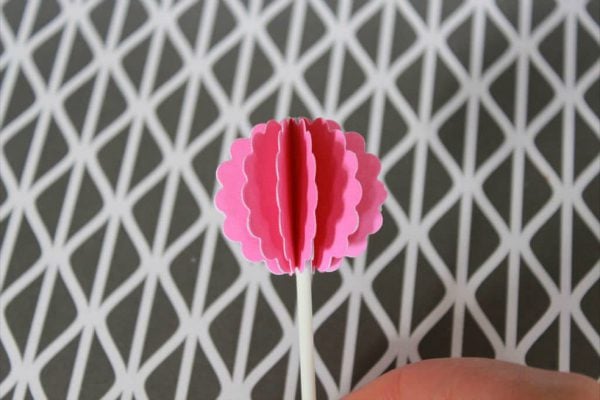
Glue the two halves together, matching edges. Fan the layers gently so the pom looks even.
6. Let it cure
Let glue set 10 minutes before inserting into the cake. If you used hot glue, it cools faster, but I still wait a few minutes.
Which paper and punch should I use?
DIY paper pom cake topper: paper and punch picks (at a glance)
| Option | Look & feel | Best for | Pros | Watch-outs |
|---|---|---|---|---|
| 65–80 lb (176–216 gsm) cardstock | Crisp, sturdy edges | Most parties | Holds shape, easy to punch | Slightly heavier; use strong glue |
| Non-bleeding tissue | Airy, fluffy | Pastels, whimsical | Lightweight, compresses well | Avoid humidity; use more layers (12–14) |
| Glitter cardstock (fine) | Sparkly accent | Night events | High impact with few layers | Heavier; glitter near food—seal edges |
| Double-sided patterned paper | Two-tone flips | Kids’ themes | Fun reveals when fanned | Patterns can look busy at 2 in |
My tests:
- Cardstock gave the cleanest circles and stood up on taller sticks.
- Non-bleeding tissue looked soft but sagged in humid rooms; 12–14 layers fixed that.
- A 1.75 in scalloped punch is best on 6–8 in cakes; 1.25 in shines on cupcakes.
Troubleshooting and expert tips
- Edges won’t line up? Stack folded circles and trim the stack before gluing.
- Pom looks flat? Add 2–4 more layers or switch to lighter paper.
- Stick wobbles? Use two small strips of double-sided tape on both sides of the stick before you glue the halves.
- Color bleeding risk? Use non-bleeding tissue; keep toppers out of the fridge where condensation forms.
- Match your theme fast: Make three poms in staggered heights. Use two colors plus one neutral.
Safety, food contact, and cleanup
- Use food-safe sticks (e.g., paper lollipop/treat sticks) intended for food.
- Keep adhesives and glitter off edible surfaces.
- If you’re unsure about glue near frosting, create a barrier: slip a paper straw over the stick and insert the straw, not the glued area, into the cake.
- Remove toppers before slicing.
Quick checklist for DIY paper pom cake toppers
- Paper selected (cardstock 65–80 lb or non-bleeding tissue)
- Punch size chosen (1.25–2 in)
- Food-safe sticks on hand
- Glue stick/tacky glue + hot glue or double-sided tape
- Drying space ready
- Barrier plan if needed (paper straw)
FAQs: DIY Paper Pom Cake Topper
How many circles do I need per pom?
Ten circles work for cardstock. For tissue, use 12–14 for a fuller look.
What size punch for cupcakes vs. cakes?
Cupcakes: 1–1.25 in (25–32 mm). 6–8 in cake: 1.5–1.75 in (38–44 mm). Tall cakes: up to 2 in (51 mm).
Can I make a DIY paper pom cake topper without a punch?
Yes. Trace a bottle cap or cookie cutter, stack sheets, and cut with sharp scissors.
Which glue is best?
Glue stick or tacky glue for paper-on-paper. Use a small bead of hot glue or strong double-sided tape only where the stick attaches. Keep adhesives off edible areas.
Are toppers food safe?
They’re non-edible decorations. Use food-safe sticks and keep glue, glitter, and dye from touching the cake. Remove before serving.
Will tissue paper bleed on frosting?
Some tissue does. Choose non-bleeding tissue and avoid condensation from the fridge.
How far in advance can I make them?
Up to 1 week. Store flat in a dry box. Fluff before use.
A DIY paper pom cake topper is the fastest, cheapest way to dress up any cake or cupcake—no special skills needed. Ready to make yours? Start with one color to learn the steps, then mix sizes and heights for visual impact. Snap a photo of your cake and share it with us. I’d love to see what you make.
Meet the Author
Cristy Posten is the founder of Pretty My Party and a party stylist with over 10 years of experience. She’s known for her creative, easy-to-follow ideas that help people plan beautiful baby showers, birthday parties, holiday gatherings, and everyday celebrations. Through her expert tips and free resources, Cristy makes hosting feel fun, approachable, and stress-free.
cute! and I love your nails too :o) Thanks for linking to the first every craft link at Tasteful Tuesdays! Hope you come back again this week and show off your stuff! Party Opens tonight at 8:30. http://www.nap-timecreations.com
Hi Emily, I definitely will! Thanks for stopping by my page!